Tuesday, December 14, 2010

Santa Lucia’s Braided Bread


001 (2)

Link to the recipe at the Family Fun site is here.  My only change was to add 1/4 tsp. of pure orange extract to the glaze because I thought it wasn’t flavored enough with just orange juice. 

I’d also like to try decreasing the recipe so that it fits in my bread machine.  This does make a huge amount of dough, so half the recipe would be enough for one meal or snack-time for our family.  I suppose if I’d have known ahead of time or actually read through the recipe last week, I could have made two rings and frozen one for later.  This time, we are just enjoying the leftover.

While I’d considered making the bread last week, I wasn’t prepared and it’s just been so hectic.  So, this was a little last minute… didn’t start on the dough until after lunch (I’m just too needed in the school-room until at least lunch/dinner).  It wasn’t baked until about 4pm and I frosted it before it was cooled because I’m just soooo impatient – and it smelled incredibly wonderful.

So, to celebrate the Feast of St. Lucy, we ate this wonderful bread and listened to her story – all because there happened to be a reminder to ‘read a story about the saint for today’ in Zeke’s syllabus.  No dressing up, no candles, no waking up early, just thankful to be reminded of our beautiful faith and trying to live it out in the smallness of our day.

Saturday, November 20, 2010

Salmon Quiche

First, I have to admit that this is the first time I, or my family, have tried Salmon Quiche.  My good friend, Sarah G., has offered her Salmon Quiche to me at least twice and I’ve turned up my nose!  Normally, I’m game for trying anything, but Salmon Quiche??  Ewwww!

A little bit of background … my supposed dislike of anything made from canned Salmon (not to be confused with my pleasurable dining experiences with Grilled Salmon) stems from my dislike of Salmon Loaf.  I have at least tried Salmon Loaf, but I just didn’t care for the texture. 

So, why try it now?  First, this recipe has a potato crust, which we all prefer.  Second, it has Chef Emeril’s ESSENCE Creole Seasoning – a little extra kick and a wonderful aroma in the kitchen.  Last but, not least, I had all the ingredients on hand!

Quiche is fairly new to my cooking rotation, but after a great recipe for Ham Quiche I served at Easter a couple years ago, quiche has become a regular entrée on busy nights.  Of course, having a steady supply of eggs makes quiche easy to prepare at the last minute.

This is adapted to the ingredients I had on hand from the original recipe … Smoked Salmon Quiche.
Everyone agreed that this recipe could be added to our rotation and that they would eat it again.  The most enthusiastic was Angelina who went back for seconds!  Eric said it was good, but then he followed up by saying, “but, I’m hungry.”  However, he then cleaned up the remainders from Graham and Angelina (another whole slice was just a bit too much with ice cream dessert on the line).

So, humble apologies to my dear friend Sarah.  I may have to try YOUR Salmon quiche, after all.

Salmon Quiche
Yield: 8 servings

Ingredients:
  • 3 1/2 cups frozen hashbrown potatoes, thawed (I thawed mine in the microwave) 
  • 1 tablespoon melted butter, plus 2 tablespoons whole butter
  • 1 tablespoon Essence (follow the link above for this recipe) or substitute your favorite creole seasoning
  • 1/4 cup grated Parmesan
  • 1 cup diced onion
  • 1/2 teaspoon garlic powder (didn’t have garlic cloves on hand)
  • 4 ounces cream cheese, at room temperature
  • 2 teaspoons lemon juice
  • 3 eggs
  • 1 cup heavy cream
  • 7 ounces boneless, skinless canned salmon
  • 1 tablespoons dill weed
  • 1/2 teaspoon kosher salt
  • 1/2 teaspoon freshly ground black pepper
Directions:

Preheat oven to 425 degrees F. Lightly grease a 9-inch deep-dish pie plate.
In a bowl, combine the potatoes, 1 tablespoon of the melted butter, creole seasoning, Parmesan cheese, and toss to combine. 
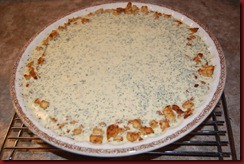
020 (3)
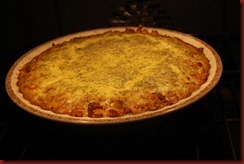
021 (3)

Dump and press the potato mixture into the prepared pie plate, spreading to evenly cover the bottom and up the sides.
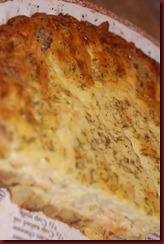
022 (3)
Bake until the potatoes are golden brown, 20-25 minutes. Remove from the oven and cool on a wire rack.
034 (2)
Reduce the oven to 350 degrees F.
Pour the remaining 2 tablespoons of butter into a small skillet over medium heat. Sauté the onions until clear and softened. Add the garlic powder, mix, and remove from heat.
025 (3)


Place the cream cheese in a large bowl and using a wooden spoon, stir in the onions and lemon juice.
027 (2)
028 (2)
Add the eggs, 1 at a time, stirring just until combined.
029 (2)
030 (2)
031 (2)

Add the cream, salmon, dill, salt, and pepper and mix well.
032 (2)
033 (2)
Pour the cream cheese-salmon mixture into the cooled potato crust and bake for about 60 minutes, until golden and the batter is set.
036 (2)
037 (2)


Cool quiche for 20 minutes before serving. Serve warm or chilled.

038 (2)
041 (2)

Monday, November 15, 2010

St. Lucy’s Eyes


The credit goes to my good friend, Sarah G., on this recipe.  I couldn’t get enough of them at our All Saint’s Day Party!  So, in her words, here is the recipe … one you should try, in my opinion. 

ST. LUCY’S EYES

Yield: 4 dozen

Ingredients:

5 oz sliced olives (I used green)

1 pkg cream cheese (go crazy and use full fat! :)

16 slices deli roast beef ( I used roast beef salami)

8 (6-7 in.) flour tortillas


Directions:

Mix cream cheese with olives and spread on a tortilla. Top with 2 beef slices, overlapping slightly. Roll up tortillas, jelly-roll fashion. Trim off ends and slice each tortilla roll into 6 (3/4 in) slices. Lay them down and add a bit of cream cheese to the top for the whites of the eyes and add an olive with pimento to the top. Easy and yummy!! The kids made these all by themselves.

St. John the Baptist Brew


Another All Saints Day favorite from Sarah G.  We weren’t sure about how it would taste after leaving it in the frig, but it was GREAT.  We both has a few cups and could’ve sipped all afternoon with our feet up, if we’d have had the time!

ST. JOHN THE BAPTIST BREW

Yield: 4 (8oz.) servings

Ingredients:

2 cups apple cider

2 cups vanilla ice cream

2 tablespoons honey (don't add the locusts! ;)

1/2 tsp ground cinnamon

1/4 tsp ground nutmeg


Directions:

Blend all ingredients together and top with additional nutmeg. Serve immediately (or don't. We waited a few hours with it in the fridge and it was SOOOO good!) I also doubled the batch and will for sure triple it for Thanksgiving. Makes a great after dinner drink!!

Monday, September 13, 2010

Mexican Stewed Tomatoes


This is the recipe I’ve used for over 12 years to make Mexican Stewed Tomatoes.  It’s my ‘secret’ ingredient in Taco Soup!

Mexican Stewed Tomatoes (#2)

Yield: 7 quarts

Ingredients:

  • 24 cups chopped tomatoes – I prefer Roma because they are meatier and have a great texture
  • 5 cups onion, chopped
  • 2 1/2 cups celery, chopped
  • 2 cups green pepper, chopped
  • 1 1/2 cups red pepper, chopped – I have substituted banana or green peppers
  • 10 cloves garlic, minced
  • 10 Tbls. dried parsley
  • 3 1/2 Tbls. cumin
  • 8 Tbls. chili powder
  • 3 Tbls. oregano
  • 4 Tbls. salt
  • 4 Tbls. sugar
  • 1 1/2 cups white vinegar

Directions:

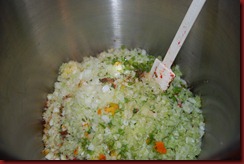
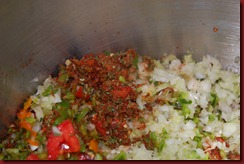
Mix all ingredients together in a large stock pot – or divide into two large pots.  Bring to simmering and simmer for 20 minutes to blend flavors together.  During this time, prepare the pressure canner, jars, lids, screw bands, etc.  After simmering, ladle hot tomatoes into warm quart jars, leaving 1” head space.  Seal and place in pressure canner.  Process quarts for 20 minutes at 10 lbs. pressure.

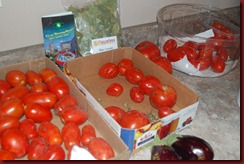
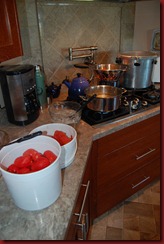
029 (2)  Tomatoes, waiting to ripen or be processed

025 (2)  This is my tomato ‘set-up’.

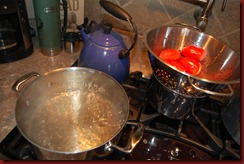
026 (2)  Strainer on the cooktop holds washed tomatoes; boiling water in the pot … tomatoes go into the water for 10 seconds to loosen the skins.

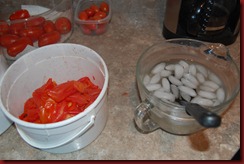
027 (2)  Then, they are plunged into ice cold water to cool.  I peel and core the tomatoes.  Lucky laying hens get to peck at the skins and cores.

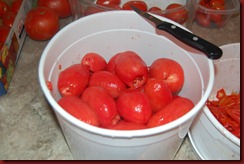
028 (2)  Cored & skinned tomatoes.  I need this 6 quart container filled with tomatoes.

030 (2)  Chopped onions, peppers, & garlic.

 031 (2)  Seasonings (some are already mixed into the vegetables.

 032 (2)  After simmering for 20 minutes.

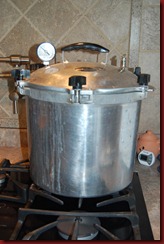
 034 (2)  This is my mom’s All American Stainless Steel Canner – no rubber seals to worry about.  7 quarts go into the canner.  After processing, the canner cools on the stovetop.  It’s cool when I can unscrew the lid.  The jars will be removed to cool on a wood cutting board for 24 hours.  After that time, I label and store in the root cellar.     

* Now, obviously these simplified directions leave out a lot of pressure canning steps … I take for granted that if you are interested in trying this recipe, that you have pressure canned in prior years.  If this is your first go-round, I suggest either purchasing the Ball Blue Book of Pressure Canning or checking out your state’s extension website for complete directions.  Each year before my first pressure canning batch, I re-read the instructions for my canner.  Pressure canning involves attention to detail and you may want to prepare and can your first batch of produce under the supervision of an experienced canner.  However, acquiring experience in this method of canning can be a wonderful way to keep up an age-old tradition and it’s a great way to store excess garden produce.

**This recipe must be canned with a pressure canner because it includes low acid ingredients (celery, onion, peppers, seasonings).  It CANNOT be canned using a water bath process.

Tuesday, August 31, 2010

Harvest Apple Bake

In my quest to find recipes that use a LOT of eggs, I came across this breakfast dish that is prepared & refrigerated overnight.  I found the recipe online at Iowa Egg Council’s website … www.iowaegg.org … I found a few other recipes to try later on, too.

Harvest Apple Bake

Yield: 8 servings

Ingredients:

  • 8 eggs
  • 1 loaf French bread
  • 2 1/2 cups milk
  • 1 cup cream
  • 1 cup sugar
  • 1 Tbls. vanilla
  • 1 Tbls. cinnamon
  • 1 tsp. nutmeg
  • 7 medium sized cooking apples (Granny Smith is one variety)
  • 2 Tbls. butter

Directions:

Slice bread into 1 1/2 inch slices.  Place bread tightly together in a 9x13 inch greased pan.  In a bowl, whisk together eggs, 1/2 cup sugar, milk, cream, and vanilla for about 30 seconds.  Pour half of egg mixture over bread.  Peel, core, and slice apples.  Place sliced apples on top of bread to cover and pour the rest of the egg mixture evenly over the apples.  Mix remaining 1/2 cup sugar with cinnamon and nutmeg.  Sprinkle evenly over the top of apples.  Dot with butter.

Cover and refrigerate overnight.  The next day, bake uncovered in a 350 degree oven for 1 hour.  Remove from oven and allow to rest for 10 minutes.  Cut into squares and serve warm with syrup and a dot of whipped cream.  YUM!

Cream of Cauliflower Soup

Who would’ve thought my whole crew would like this soup.  I made the soup because the cauliflower needed to be used and we really don’t care for the raw vegetable.  The soup was easy to make and I had all the ingredients on hand. 

021 (3)

Cream of Cauliflower Soup

Yield: 6 servings

Ingredients:

  • 3 Tbls. butter
  • 1 small onion, chopped
  • 1 1/2 quarts chicken broth
  • 10 oz. frozen cauliflower*
  • 1 1/2 cups milk
  • 2 Tbls. flour
  • salt & pepper to taste

Directions:

Melt butter in a sauce pan, add onion.  Sautee onions until translucent.  Add flour and mix thoroughly.  Add broth and bring to a boil.  Add cauliflower; simmer until tender.

Use a slotted spoon to remove cauliflower from the pot into a blender.  Puree the cauliflower, then add back to the pot.  Mix well.  Add milk, salt & pepper.  Heat to a low simmer, being careful not to boil.

*I used fresh cauliflower.  As the vegetable is simmered in liquid until soft, using fresh meant simmering just a bit longer.

**My own touch was to add a bit of chopped parsley and shredded cheese on top.


Copyright © 2010 Leanne Ely, CNC  All rights reserved.

Monday, August 30, 2010

Peach Wow!


The Pioneer Woman Cooks cookbook by Ree Drummand has 5 star after 5 star recipe.  I’ve tried over a handful and my family has raved and ahhed over each.  With a couple lugs of peaches in the frig, I made plans to try her Peach Crisp.  It did NOT disappoint.  I recommend you try it today!

Peach Crisp with Maple Cream Sauce

Tuesday, August 24, 2010

Peach Pie

Yes, it’s that time of year.  The peach trucks roll into the biggest towns nearby and I dutifully trek to town and stand in line for my lug … or two of sweetness.  I’m hoping to capture a lug or two tomorrow, in fact.  While we’ll eat quite a few with cream or just plain, our favorite dessert is Grandma Golden Acres’ Peach Pie.  A Peach Pie any other way just isn’t the same.

Grandma Golden Acres’ Peach Pie
Unbaked 10 inch pie shell – you can use the Never Fail  Pie Crust recipe I just posted or use your favorite recipe.  You can use a smaller pie crust, but you should decrease the cream/sauce or you will have leftover – I’ve been known to eat this alone.  Fill the bottom with peaches; heaping is what I prefer.  You’ll need about 5 or 6 large peaches (if your peaches are smaller, you’ll need 7 or 8).  Pour the following sauce, well mixed, over the peaches:
  • 1 cup sugar
  • 1/2 cup flour
  • 1 cup cream
  • 1 tsp. almond extract
Top the pie with a second crust & crimp the edges.  Cut slits in the top if you haven’t already done something else decorative.  I always place the pie plate on a large baking sheet or pizza pan to prevent spills from reaching the oven.  I’d also recommend placing thin strips of aluminum foil around the crimped edge to prevent it from burning.  Bake at 450 degrees for 10 minutes.  Reduce heat to 350 degrees and bake for an additional 50 minutes.  Remove the aluminum foil for the last 15 minutes of baking.
Serve with ice cream, whipped cream or Cool Whip!

Never Fail Pie Crust …

for real … it’s never failed me.  Even when I’ve used whole wheat pastry flour or substituted coconut oil for the shortening.  The coconut oil, by the way, is delicious!

Never Fail Pie Crust

Ingredients:

  • 2 1/2 cups all-purpose flour
  • 1 heaping Tbls. sugar
  • 1 tsp. salt
  • 1 cup lard, Crisco, butter or coconut oil
  • 1 egg yolk
  • Milk


Directions:

Mix together with a fork the flour, sugar, salt and shortening.  Slightly beat the egg yolk and add enough milk for 2/3 cups liquid.  Mix together the 2 mixtures.  Makes four 1-crust pies or 2 double crust pies.

*If you use coconut oil, you may need to add an additional 1/3 cup flour for the correct texture & ‘roll-ability’.

**I have frozen the dough with good results.  Divide the dough into four portions.  For the portions you will freeze,  put each in a ziploc baggie.  Then, place them in another baggie – essentially double bag them.  Thaw fully in the refrigerator before using the dough.  The outside of the dough ball may be slightly colored upon thawing, but the color won’t be noticeable after baking.

Gmail - Inbox (3) - nd.bisonfan@gmail.com

Sunday, August 22, 2010

Keeping ahead of the green & yellow zucchini!


Coming up with different ways to use zucchini has been elusive.  Mainly because by the time I ‘find’ my zucchini they’ve grown to the length of baseball bats and the diameter of at least a softball.  However, if I can harvest every - or every other - day and get the squash when they are smaller, it’s much easier to keep ahead and use them up faster.  This dish is a take-off of a recipe I found in a magazine.  The seasoning is mild and not too spicy.


Mexican Spaghetti

Yield: 6 servings

Ingredients:

  • 3/4 lb. ground beef
  • 2 1/4 cups water
  • 1 can (15 oz.) tomato sauce
  • 2 tsp. chili powder
  • 1/2 tsp. garlic powder
  • 1/2 tsp. salt
  • 1/2 tsp. ground cumin
  • 8 oz. spaghetti, broken into thirds
  • 1 Tbls. olive oil
  • 5 or 6 small zucchini (I used both colors), cut into slices

Directions:

If you haven’t already browned the meat, do so now.  Drain it and set it aside.  Saute the sliced zucchini in the olive oil until softened & slightly browned.  Set aside. 

In a large skillet – I used my wok because it’s large & non-stick – combine the water, tomato sauce, chili powder, garlic powder, salt & cumin.  Bring to a boil.  Stir in the spaghetti pieces; return to boiling.  Boil for 6 to 7 minutes.

Add the zucchini.  Cook an additional 4 minutes or until the spaghetti is tender.  Stir in the ground beef.  Serve immediately.

Tuesday, June 8, 2010

Grandma Eva's Sponge Cake

Recently received this email from my mom (I edited the title & text just slightly to eliminate ‘email-speak’ and protect identities) …
Suzie,
Was going through my recipe's looking for bar recipe's … and I found a recipe from Grandma for Sponge Cake with 12 egg yolks.  Don't know if you remember it - but I made it a few times - sponge cake is rich.  I like it plain, but I remember Dad liked it with a thin orange or lemon glaze.  So here it is:
Grandma Eva's Sponge Cake
3 cups Cake Flour
4 tsp. Baking Powder
1 tsp. Salt
12 Egg Yolks
2 Cups Sugar
1 Tbsp Grated Orange Rind
2 Tbsp. Lemon Juice
1 Cup Boiling water
Mix and sift flour, baking powder and salt - Beat egg yolks until thick and light colored.  Gradually add sugar, beating until very thick and light colored.  Beat in orange rind, lemon juice and boiling water.  Fold in flour and put in tube pan.  Bake 350 degrees for 50-60 minutes. Invert 1 hr.

Wednesday, April 28, 2010

Quiche Supper

I’ve become a fan of quiche.  I wouldn’t have said that a year ago, because I hadn’t even made a quiche before Easter 2009.  However, it’s a great way to use up bits of meat, veggies, and cheese … and it’s quick!
018 (2)
Quick Quiche
Yield: 6-8 servings
Ingredients:
  • 4 eggs
  • 1 1/2 cups whipping cream, 1/2 & 1/2 or milk
  • 1/2 cup vegetables, cooked
  • 3/4 cup diced meat – ham, chicken, shrimp, etc.
  • 1 1/2 cups shredded cheese – cheddar, swiss, colby, etc.  (swiss is my favorite)
  • salt & pepper to taste
  • Other extras: chopped green onion, chopped chives, chopped parsley, dash of nutmeg
Directions:  Preheat oven to 325 degrees.  Spray or butter a 9” pie dish.  Beat the eggs and mix in the cream.  Add the vegetables, meat and cheese.  Mix thoroughly.  Add seasoning.  Pour mixture into the pie dish. 
 017 (2)
Bake for 40-45 minutes or until just set in the center. **I needed to bake my quiche for 20 minutes longer.  Be prepared for that!**  Let set 10 minutes before serving.
019 (2)
Note:  I usually bake pies/quiche, and anything I ‘think’ might boil over, on a large pizza pan.  Save me from having to put up with a burnt smell until I have time to thoroughly clean the oven.

Friday, April 23, 2010

Chocolate Angel Food Cake ...

... with the substitute cake flour. 


Aside from my being a little rusty in removing all the large air bubbles, the cake looks and 'feels' right.  There are a couple of large depressions around the edge and one on the top of the cake where I didn't get all the air pockets deflated before baking.  I don't remember having to run knife through the batter and being so diligent about it, but I probably wasn't the one doing it!  Besides, who will really be able to tell once we slice it up and put a dollop of whipped cream and raspberries over top???  Well, if they notice, hopefully they'll not say anything.  SHhhhhh!

Here's the recipe I used, should you suddenly find yourself with an abundance of egg whites.

Chocolate Angel Food Cake

Ingredients:
1 1/2 cups powdered sugar
1 cup cake flour
1/4 cup cocoa powder
12 egg whites (about 1 1/2 cups ... my amount was more & it turned out fine)
1 1/2 tsp. cream of tartar
1 cup granulated sugar
1 1/2 tsp. vanilla
1/4 tsp. salt

Directions:

Move oven rack to the lowest position.  Heat oven to 375 degrees.  Mix powdered sugar, cocoa, and flour in a separate bowl and set aside.  Beat egg whites and cream of tartar in medium bowl on medium speed until foamy.  Beat in granulated sugar on high speed, 2 tablespoons at a time, adding vanilla and salt with the last addition of sugar.  Continue beating until stiff and glossy.  Do not underbeat.

Sprinkle sugar-flour mixture, 1/4 cup at a time, over meringue, folding in just until the sugar-flour disappears.  Spoon into an ungreased tube pan.  Cut gently through batter - apparently this step is pretty important!

Bake 30-35 minutes or until cracks in cake feel dry & spring back when touched lightly.  Immediately turn pan upside down onto glass bottle or metal funnel.  Let hang two hours or until cake is completely cool.  Remove from pan.

Thursday, April 22, 2010

Egg Yolk Cookies

This is the recipe to have after you’ve made a home-made Angel Food cake!  They’re crisp and flavorful with a nice yellow/orange tint to the batter.


Egg Yolk Cookies

Ingredients:
12 egg yolks
1 c. brown sugar
1 c. white sugar
1 1/2 cups butter
2 –3 tsp. lemon & orange flavoring
3 1/2 cups flour
1/2 tsp. salt
1 tsp. soda
2 tsp. baking powder


Directions:
1. Preheat oven to 350 degrees.
2. Cream sugars with butter.  Add slightly beaten egg yolks.
3. Sift dry ingredients; add to creamed mixture.
4. Add flavoring.  *I added 2 tsp. pure lemon extract … I didn’t have orange extract available.
5. Use a small cookie scoop to drop little balls onto the cookie sheet and then flatten with a glass dipped in sugar.


6. Bake 7-10 minutes.

Cake Flour Substitute


5150042000

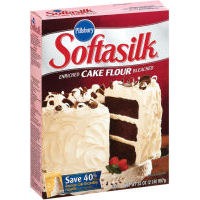
I remember my mom always having a box of Softasilk cake flour in the cupboard.  Those were the days when we didn’t have many boxed cake options and our Angel Food cake was always made from scratch.  For years, now, I’ve just bought the boxed mix for Angel Food cake, but that is about to change!  With our new-found supply of eggs, I am making an Angel Food cake from scratch (then I can test out the 12 egg-yolk cookie recipe, which I did eventually remember to search for and print out).

But, Angel Food Cake recipes always call for cake flour, which has a lower gluten content than other flours.  I do not keep cake flour on hand, so am going to try a substitution of 3/4 cup all-purpose flour, sifted, plus 2 tablespoons cornstarch for every cup of cake flour called for in the recipe.

I have seen at least one review that said it didn’t work well for Angel Food Cake, but I am going to try it regardless.  I wonder if the flour was properly sifted before being added to the Angel Food Cake batter … I’ll wonder until I try it. 

Dash’s birthday is later this week, and for his celebration with family, I’m planning to make a Chocolate Angel Food cake.  I remember them as being very tasty served with whipped cream and berries!  I’ll post my Chocolate Angel Food cake recipe and a picture later, then you and I will both know if the cake flour substitute ‘works.’

Wednesday, March 10, 2010

Italian Sausage Bake

This recipe is an adaptation from one found on the Velveeta box; it turned out great and the kids loved it … well except for one who doesn’t really care for spicy Italian sausage.  We made a deal and he ate half the meat on his plate – made sure his water glass was handy to tame the fiery tongue!

Italian Sausage Bake
Yield: 12 servings

Ingredients:
16oz. Rigattoni (or other tube shaped) pasta
1 lb. Italian sausage, casings removed
16 oz. tomato sauce
1 tsp. oregano
1/2 lb (8 oz.) Velveeta, cut into 1/2 inch cubes
1/2 cup grated parmesan cheese

1.  Preheat the oven to 350 degrees.  Cook pasta as directed.
2. Brown the sausage in a deep skillet over medium heat.  Add tomato sauce and oregano.  Add the Velveeta and stir until thoroughly mixed.
3. In a 13x9 inch pan, mix the pasta and meat mixture together.  Top with parmesan cheese.
4. Bake 20-25 min. or until heated through.

** Serve with a side salad and garlic toast.

--UPDATE--
While the kids and I really liked the spicy flavor (except for the one child, anyway!) we ALL agreed that it was too much Velveeta, especially noticeable on leftovers.  I would cut the amount back to 3/4 cup or even 1/2 cup.

Monday, March 1, 2010

New Cooking Resource … coming soon!

30 Day Gourmet, my source and inspiration for Once a Month Cooking (OAMC) is publishing a new book called 30 Day Gourmet’s BIG Book of Freezer Cooking.  If this is a topic you are at all interested in, check out the link for a 15 page preview of the book.  The preview includes four sample recipes … I’m especially interested in trying the Fried Rice.

Friday, February 19, 2010

Buckwheat Pancake Mix #2

Buckwheat Pancake Mix #2
Yield: 7.5 cups

Ingredients:
4 cups whole wheat flour
1 cup buckwheat flour
7/8 cups powdered eggs*
3/4 cup dry buttermilk powder
1 1/2 Tbls. baking powder
1/2 cup sugar

Directions:
Mix all ingredients in a large bowl with a whisk.  Store in an airtight container.  Can be kept in the pantry for about a month or in the refrigerator/freezer for 6 months. 

To Prepare:
1 cup buckwheat pancake mix #2
1/2 cup water
2 Tbls. melted butter

Stir the water and pancake mix together in a small bowl.  If batter is too thick, add a bit more water and stir again.  Drop approximately 1/4 cup onto hot skillet.  Makes 4 pancakes.  Double or triple as necessary.

*Can substitute 1/3 cup soy flour for the powdered eggs. 

Tuesday, February 16, 2010

Shrove Tuesday – King Cake

I found the recipe for King Cake at the King Arthur Flour Company website.  I haven’t ever made a special cake for Shrove Tuesday, not for lack of wishing and wanting!  This is the year my wish was made reality.  Food coloring are generally avoided in our household, mostly due to my sensitivity, but I just couldn’t resist making the cake ‘as it should be’ … colorful and completely festive.


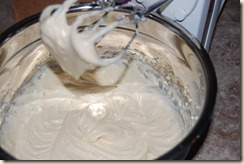
Mixing the dough ingredients…

001 (7)


While the dough rises, I mixed up the cream cheese filling:

003 (6)


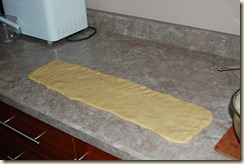
Preparing the dough … I formed the rectangle by hand:

004 (4)


I was distracted, so there is no picture of the filling being placed on the dough.  Fold the dough over the filling and transfer to a baking sheet:

005 (4)


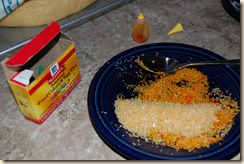
While the dough rests and rises (about 1 hour), I colored the sugar.  The green and yellow turned out nice … can you tell the other is purple??

006 (4) 007 (4)


After baking, let the cake cool for about 10 minutes, then remove to a cooling rack:

008 (4)


After completely cool, frost the cake and decorate with colored sugar:

017 (2)

The purple looks better on the cake than on the blue plate.


Cake was enjoyed by all!

019 (2)

Monday, February 15, 2010

Buckwheat Pancake Mix

As a child, I can remember enjoying a little pancake variety.  Sometimes, fruit such as banana slices or blueberries (my personal favorite) would be added.  Occasionally, my mom would purchase buckwheat pancake mix created by an in-state company.

For Lent, we are not going to buy any additional cold cereal  We’ll finish up what’s in the pantry and then necessarily be more creative.  Yes, it will take more time in the morning, but we always have breads (bagels, english muffins, homemade bread), fruit, oatmeal and eggs on hand.  Another goal is to teach the older kids how to make some easy breakfast dishes, including pancakes.

To cut down on pancake preparation time, I made up a double batch of buckwheat pancake mix.  There are many variations, but this is the recipe I created after examining the ingredients I had on hand.

Buckwheat Pancake Mix #1
Yield: Approximately 7.5  cups mix

Ingredients:
2 1/2 cups all purpose flour
2 1/2 cups buckwheat flour
1 1/2 Tbls. baking powder
1 Tbls. salt
1/2 cup sugar

Storage:
In a large bowl, mix all ingredients with a whisk.  Transfer the mixture to a resealable container.  Store in pantry for about 1 month, or in the refrigerator/freezer for 6 months.


__________________________________________________________

Buckwheat Pancakes

Ingredients:
1 cup Buckwheat Pancake Mix
1 cup milk
1 egg
2 Tbls. melted butter

Directions:
Stir the ingredients together in a small bowl.  If batter seems to thick, add more milk and stir again.  Drop by 1/4 cup-fuls onto a hot skillet.  Makes approximately 4 pancakes.  Double or triple the recipe as necessary.

Saturday, February 13, 2010

Caramel Puff Corn

Caramel corn has always been a favorite snack of mine.  But, this may actually be better than ‘regular’ caramel corn … no hulls to get stuck between teeth!  It was snowing like the dickens today, so I made a batch.  I had intended to make it for a Superbowl snack, but really wasn’t in the mood after our favored team wasn’t IN the Superbowl.  It’ll be a perfect movie or game-night snack.

001 (4) 

Caramel Puff Corn
Yield:  15 servings

Ingredients:
2 – 4.5 oz. bags Puff Corn

1/2 cup light corn syrup
1 cup brown sugar
1 cup butter
1 tsp. baking soda


Directions:
1.  Preheat oven to 250 degrees.
2.  Spray a large roaster with cooking spray and put the puffed corn in the roaster.
3.  Combine brown sugar, butter and corn syrup in a saucepan.  Bring to a boil and continue boiling for 2 minutes.
4.  Add baking soda.  Expect the caramel to expand.  Pour over the puffed corn and mix thoroughly.
5.  Place roaster in the oven for 45 minutes.  Stir the puffed corn every 15 minutes.
6.  Remove from oven when done and spread over waxed paper to cool.

Monday, January 25, 2010

Pound Cake


Angelina needed Pound Cake as an ingredient in a layered pudding dessert this past week.  So, she and I set out to make our first ever Pound Cake.  Having tried store-bought pound cake before, I wasn't thrilled about making a Pound Cake.  They've usually been a little dry.  However, home-made (as always) is MUCH better.  Pound Cake is heavy, moist and quite rich in flavor.  I've been eating plain slices all weekend.


Did you know that the first pound cakes were made with a pound each of butter, sugar, flour and eggs??  Guess that's where the name comes from...


POUND CAKE
Yield:  24 servings

2 3/4 cups sugar
1 1/4 cups butter, softened
1 teaspoon vanilla or almond extract (almond is the way to go!)
5 eggs
3 cups flour
1 teaspoon baking powder
1/4 teaspoon salt
1 cup evaporated milk*

1. Preheat oven to 350 degrees.  Spray a 12-cup bundt cake pan or tube pan.

2. Beat sugar, butter, almond and eggs in a large bowl, scraping the bowl constantly until mixed thoroughly.

3. Add milk and beat until mixed thoroghly. 

4. Mix flour, baking powder and salt in a separate bowl.  Then add to the large bowl, mixing on low speed  and scraping the sides constantly. 

5. Spread in the pan.  Bake 70-80 minutes or until toothpick inserted in the center comes out clean.

6. Cool 20 minutes; remove from pan and cool completely on a wire rack.

*I used the whole can without problem.  A pet peeve is when you have a 12oz can and the recipe only calls for a cup!  What do you do with the extra 4oz??  I can't stand the thought of wasting it or throwing it away.

Thursday, January 7, 2010

Sourdough Buns


The buns have a texture that is between bread and biscuit.  They're light and slightly dry, so use them or freeze within a day or two.  The King Arthur comments note the buns are moist, so the fact that mine tend to be dry (in two batches) is probably due to the fact that I'm a novice bread baker.  The flavor is wonderful, so I will be baking more.  It's a great way to use up sourdough starter, too.