Wednesday, December 21, 2011

Just a little chocolate topping…

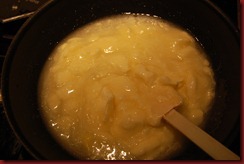
I used this Hot Fudge recipe as one layer in the Peppermint Torte I made today.  So, here’s the recipe.  It would be great over ice cream, too.

Hot Fudge

Yield: approx. 1.5 cups

INGREDIENTS

14 oz. Sweetened Condensed Milk

4 (1oz.) squares semi-sweet chocolate

2 Tbs. butter

1 tsp. vanilla

DIRECTIONS: Mix the first three ingredients together in a small saucepan.  Heat over medium heat until the chocolate is melted.  Remove from heat, add vanilla and stir until thoroughly blended.

Thursday, December 8, 2011

Sweet (irresistible) snack


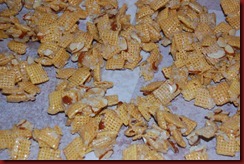
Nutty Cereal Mix

(I have no idea what it’s truly called because I didn’t ask for the recipe name!)

Yield: A LOT – Believe it or not, this was doubled in many of the recipes I researched.

INGREDIENTS

1 cup butter

1 cup white sugar

1 cup light corn syrup

1/2 cup flaked coconut

20 oz. cereal – Crispix, Rice Chex, Corn Chex, Honey Nut Chex

3/4 cup sliced almonds (toasted under a broiler until nicely browned)

DIRECTIONS: Boil butter, sugar, and corn syrup for 3 minutes. 

008 (3)

009 (3)

Measure cereal, coconut, and almonds into a large bowl. 

004 (3)

006 (3)

Pour syrup over the mixture and stir until coated. 

011 (2)

Spread the mixture out on waxed paper to cool.  Store in an airtight container.

Note:  The almonds can be omitted or reduced, and the coconut can be reduced, as well, to suit individual tastes.  Either way, it won’t last long!

Sunday, November 13, 2011

Turkey


015

I believe this was my first solo attempt at ‘large’ turkey baking. 

Our 4-H club did a traditional Thanksgiving meal for it’s November meeting/potluck last year, and we enjoyed it so much we decided to do it again.  Our family hosted this past Sunday and it’s always easier to bake the turkey in the location where it will be served.  This is a 16 pounder and I stressed about it!  I read through cookbooks and checked online to make sure I’d have enough time to roast it.  Sunday morning, I got up at 5am to wash the bird (it’d been thawing since Tuesday) and prepare it for baking.  I stuffed it with onions and celery, then basted it with butter and poultry seasoning.  I even loosened up the skin around the breast and slathered some seasoned butter under the skin.  That wasn’t easy! 

The bird went into the oven at 6am.  Before leaving for Mass, I did cover the bird in foil.  I came home early from religious ed. and took it out of the oven at 11am.  The pop-up was popped; I’m not sure for how long.  I removed the bird from the oven and covered it in foil to rest and let the juices re-distribute.  It sat until Noon.  I started slicing and cutting up at that time.  The meat wasn’t too hot to handle and it sliced nicely, even with my limited knowledge.  At least no one complained!

Last year, I roasted a smaller bird and it fit in an oven bag.  We didn’t have left-overs.  I knew we’d need a larger bird this year because there were more people and the kids have grown.  I had almost a gallon bag of leftovers and was thrilled.  We’ve been eating turkey noodle soup, sandwiches, and turkey a la king all week. 

I’d still like to try smoking a turkey on the grill…

Friday, August 26, 2011

Chocolate anyone??


Mom’s Chocolate Chip Cookies

Yield: 3.5 dozen

Note: This recipe is from my mom.  You can substitute chocolate pudding and white chocolate chips or make up your own combinations.  Chocolate-chocolate, chocolate-butterscotch, vanilla-chocolate… the list is long.  I usually eliminate nuts from any recipe, and this recipe doubles well.


INGREDIENTS

1 cup butter

1/4 cup white sugar

3/4 cup brown sugar

2 eggs

2 1/4 cups flour

1 tsp. baking soda

1 tsp. vanilla

1 pkg instant vanilla  pudding

1 – 12oz. pkg. chocolate chips

1 cup nuts, chopped (optional)


DIRECTIONS:  Preheat oven to 357 degrees.  Cream butter and sugars.  Add egg and beat until smooth.  Add vanilla, baking soda, and flour.  Mix until ‘just’ mixed.  Add pudding, chocolate chips and nuts.  Mix together.  Bake at 375 degrees for 10-12 minutes.  Let cool a few minutes on the cookie sheet.  Remove from cookie sheet to a cooling rack and cool completely before storing.

Thursday, August 25, 2011

Planning meals & MSCD


As we look to start school after Labor Day, it’s also time to start up the menu planning and plan for a Mini Session Cooking Day (MSCD) while I still have time.  I planned out five week’s and left plenty of room for leftovers.  With Dash gone at supper time for football practice, it’s challenging to adjust the quantities appropriately!

Once school starts, free time for cooking disappears and it’s so nice to have a few home-made meals in the freezer to pull out on crazy days (you know the ones where you planned to be done at 2pm, but are still there at 5pm for some unknown reason??).

Monday was my opportunity for a MSCD.  I planned it out the night before and chose recipes for which I already had ingredients on hand.  This is what’s in the freezer (or frig or pantry) today…

2 gallons Italian Sausage Soup

2 gallons Taco Soup

2 dozen Meatballs

2 quarts Mexican meat filling

1 loaf Chocolate chip Pumpkin Bread (one was eaten, the other is on the counter!)

2 dozen Chocolate dipped Peanut Butter Balls*

2 dozen No-Bake cookies

2 quarts Taco Rice

10 bags Brownie mix (each makes an 8x8 inch pan)

Dash made the Brownie mix and prepared the peanut butter balls for dipping.  That helped sooo very much.  Some of the recipes are on my blog, others are available for free (some after joining) on the website of 30 Day Gourmet. 

*These are so easy and absolutely yummy.  Great treat for harvest time lunch boxes when the guys want something candy-like, but I don’t want to pay the price for candy.  I had about half of a White Chocolate Flavor Ghirardelli candy making and dipping bar (2.5 lbs purchased at Sam’s Club during Christmas season) leftover.  I used half (so a quarter of the package) for the recipe.

Favorite Taco Soup


TACO SOUP

Notes:  This recipe is from Suzie’s NE friend, Michelle M.
Servings: Approximately 12

INGREDIENTS:

2 lb. Hamburger
1 small chopped onion
4 oz. can Chopped Green Chilis
1 Pkg. (1.25oz.) Taco Seasoning (we make our own Taco Seasoning Mix)
1 pkg (1oz.) Ranch mix
2 cans (15oz.) Chili Recipe Stewed Tomatoes (I can my own Mexican Stewed Tomatoes)
2 cans (15oz.) Bush’s Hot Chili Beans (generally use the store brand)
1 ½ -2 cups Water
8oz. Mexican Blend Cheeses
1 Bag Fritos (Ranch or Chili Cheese Flavored are good, but plain Fritos are used more often at our home)
8oz Sour Cream (we use more sour cream!)

DIRECTIONS:
Brown hamburger & chopped onion, drain grease. Add chopped green chilies, beans, tomatoes, taco & ranch seasonings, and water. Simmer 30-45 minutes for best results or let it simmer in the crock pot for 4-6 hours. Serve soup over the Fritos. Then, top with cheese and sour cream.

FREEZING:
Cool completely.  Transfer to a gallon freezer bag.  Remove as much air as possible.  Double bag for safety!  Label and freeze on a cookie tray to keep the bag flat.

PREPARATION:
Thaw in the frig or in microwave.  Reheat on the stove or in a crock pot.  Serve soup over Fritos.  Top with shredded cheese and sour cream.

Monday, August 22, 2011

Chocolate Substitution Chart


I recently had need for chocolate substitution…

Hubby’s birthday = German Chocolate Cake. 

German Chocolate Cake = Sweet Baking Chocolate 4oz. 

Bare Cupboard = Substitution!


Chocolate, Bittersweet:

Substitute 1 (1-ounce) square semi-sweet baking chocolate for 1 (1-ounce) square bittersweet baking chocolate.

Bittersweet and semisweet chocolate may be used interchangeably in recipes, but there may be slight differences in flavor and texture.


Chocolate, Semi-Sweet:

3 tablespoons chocolate chips for every 1-ounce semi-sweet baking chocolate.

1-ounce bittersweet baking chocolate for every 1-ounce semi-sweet bittersweet baking chocolate.

1-ounce unsweetened baking chocolate and 1 tablespoon granulated sugar for every 1-ounce semi-sweet baking chocolate.

3 tablespoons unsweetened cocoa powder, 3 tablespoons sugar and 1 tablespoon butter, margarine or shortening for every 1 ounces of semi-sweet baking chocolate.

Chocolate Chips, Semi-Sweet:

1 ounce semi-sweet baking chocolate for every 1 ounce of semi-sweet chocolate chips.

1-ounce sweet baking chocolate for every 1-ounce chocolate chips.

1-ounce unsweetened chocolate plus 1 tablespoons sugar for every 1-ounce chocolate chips

Chocolate, Sweet Baking (German's):

3 tablespoons unsweetened cocoa powder, 4 teaspoons sugar, and 1 tablespoon butter, shortening or vegetable oil for every 1-ounce German's sweet baking chocolate.

1 ounce dark sweet chocolate for every 1 ounce German's sweet baking chocolate.

Chocolate, Unsweetened:

3 level tablespoons unsweetened cocoa and 1 tablespoon butter, margarine or shortening for every 1-ounce unsweetened baking chocolate.

3 level tablespoons Dutch-process cocoa plus 1 tablespoon shortening, butter, or oil for every 1-ounce unsweetened baking chocolate.

1/2 cup (3 ounces) unsweetened chocolate chips or morsels - plus cut sugar by 1/4 cup and shortening by 1 tablespoon in your recipe.

Cocoa, Unsweetened:

Substitute equal amounts of Dutch-processed cocoa for unsweetened cocoa. Leave out any baking soda called for in the recipe.

3 tablespoon carob powder plus 2 tablespoons water for every 1-ounce unsweetened cocoa.

Do not substitute instant cocoa mix for unsweetened cocoa in any recipe.

Dutch-Process Cocoa:

3 tablespoons unsweetened cocoa powder plus a pinch (1/8 teaspoon) baking soda for every 1-ounce Dutch-Process Cocoa.

1 ounce unsweetened chocolate plus 1/8 teaspoon baking soda (reduce fat in recipe by 1 tablespoon).

3 tablespoons carob powder for every 1-ounce Dutch Process Cocoa.

Milk Chocolate:

Substitute equal amounts of sweet chocolate OR semi-sweet chocolate for milk chocolate.

Sunday, August 14, 2011

At your repeated request!

Blueberry French Toast

Yield: 8-12 servings


INGREDIENTS

12-14 slices day old bread (I used a large loaf of French bread cut into 1” cubes)

2 (8oz.) pkgs. cream cheese 

1 cup fresh or frozen blueberries

12 eggs

2 cups milk

1/3 cup maple syrup or honey


DIRECTIONS:  Cut bread into 1” cubes.  Place half into greased 9x13-inch pan.  cut cream cheese into 1-inch cubes and place over bread cubes.  top with blueberries and remaining bread.  In large bowl, beat eggs.  Add milk and syrup.  Mix well and pour over bread.  Cover and chill 8 hours or overnight.  Remove from refrigerator 30 minutes before baking.  Cover with foil and back at 350 degrees for 30 minutes.  Uncover and bake 25-30 minutes more or until golden brown and center is set.

SAUCE

1 cup sugar

2 1/2 Tbls. cornstarch

1 cup water

DIRECTIONS: In saucepan, combine sauce ingredients.  Bring to boil over medium heat for 3 minutes, stirring constantly.  Stir in 1 cup blueberries.  Reduce heat and simmer 8-10 minutes until berries burst.  Put sauce into pour pitcher to serve over hot dish. 


**This dish reheats fabulously!  We ate it almost three days in a row and enjoyed every bite.  I didn’t think to take a picture, but it looks wonderful, too.

Friday, August 5, 2011

Peanut Butter and Chocolate

… is always a good combination!


163


Peanut Butter Finger Bars

Yield: 20 servings


INGREDIENTS:

1/2 cup butter

1/2 cup white sugar

1/2 cup brown sugar

1/3 cup peanut butter

1 egg

1 cup flour

1 cup oatmeal

1/2 tsp. baking soda

1/2 tsp. vanilla

1/4 tsp. salt

1 cup semi-sweet chocolate chips

DRIZZLE INGREDIENTS:

1/2 cup powdered sugar

2 Tbls. peanut butter

3 to 5 tsp. milk


DIRECTIONS:  Preheat oven to 350 degrees.  Cream butter and sugars.  Add peanut butter and blend together.  Add egg and beat until mixed.  Add flour, oatmeal, baking soda, vanilla and salt.  Mix well.  Spread mixture into a 13x9 inch pan.  Press evenly.  Bake for 15-20 minutes in a 350 degree oven. 

Immediately after taking bars out of the oven, sprinkle 1 cup chocolate chips over the top.  Let stand 5 minutes, then spread evenly to coat bars. 

In a small bowl, mix together the Drizzle Ingredients.  Drizzle over chocolate frosting.  Cool completely and cut into bars.  These bars freeze quite well.

Saturday, July 30, 2011

Canning Cherries!

Thursday was the day to accomplish the task.  I enlisted Angelina because this may well be her 4-H Food Preservation project for the coming 4-H year.  As a 4-Her, I remember receiving a Grand on my cherries one year. 

Memories of my dad, and all of us kids, eating canned cherries are still quite vivid.  I have no idea if my family will like canned cherries as much as my dad and siblings did years ago, but I’m always looking for a good alternative to boxed cold cereal for our breakfasts. 

Each canned quart needs about 2 to 2.5 pounds of cherries, pints approximately half that amount.  We’ll use a raw pack with a light sugar syrup.  Interestingly, the Ball Canning Book recommends pricking each cherry if they are not pitted … I do NOT remember doing this when canning with my mom.  Rather than rely on my somewhat shady memories of canning, we’ll prick the cherries to prevent bursting or shrinking.

Light Sugar Syrup

2 1/4 cups granulated sugar

5 1/2 cups water

Combine the sugar and water in a saucepan and heat at med-high until the sugar is dissolved.  Keep the sugar syrup heated until ready to pour over fruit.  Each batch yields 6 1/2 cups of syrup.  (I like to make a double batch right away.  If there is leftover it can be stored in the frig for a couple weeks until the next canning session.)


Cherries

Raw Pack Processing: 

1. Wash cherries and drain.

  004 (3)

2. Prepare the light syrup, and keep it hot.

001 (5)

3. Sterilize jars.  I have used the dishwasher to sterilize, but have also used the boiling water in the canner to accomplish the task.  The dishwasher will keep the jars hot, but you can also use the oven to keep jars hot. 

002 (5)

006 (3)


4. Ladle 1/2 cup hot syrup into a sterilized, hot jar.

  007 (3)

5. Fill jar with cherries.  Shake the jar gently to pack the cherries and leave 1/2 inch headspace. 

008 (3)

009 (3)

010 (3)

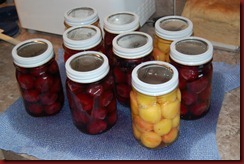
6. Ladle hot syrup over the cherries to cover.  Remove air bubbles, wipe jar rims and cap. 


012 (3)

013 (3)

014 (3)


7. Process pints and quarts for 25 minutes in a boiling water canner.  Since we live above sea level, our processing time is adjusted by adding 5 minutes.

015 (3)

016 (3)

8. Let jars cool for 24 hours before storing.

017 (3)

Wednesday, July 27, 2011

Strawberry Scones


First saw these on Regan’s, then had to link  and link to find them here!  I planned to freeze them for next week, but I snuck a taste before they cooled completely.  Utterly light and delightful! 

My only issue is that the batter doesn’t make enough to completely fill my mini scone pan.  I’ll find a way to adjust and add about a quarter more to the dough (there are plenty of strawberries to accommodate) and fill the remaining 4 scone forms.  Either that or I need to make them all smaller!

My notes and changes are italicized.

002 (4)

Strawberry Scones

Yields: 6 large scones or 12 mini scones

Ingredients:

1 cup diced strawberries (or other fruit)

3 Tablespoons granulated sugar

2 cups all-purpose flour

2 teaspoon baking powder

¼ teaspoon salt

6 Tablespoons butter, cubed

2/3 cup half-and-half or cream or cold buttermilk*

Topping:

1 Tablespoon granulated sugar

Preheat oven to 400 degrees. Lightly grease a cookie sheet. I used a mini scone pan.

If using larger fruit, cut into bite-sized pieces. Sprinkle fruit with ½ tablespoon sugar; set aside. Be sure to dice the pieces small or they tend to fall out of the dough. They’ll still be plenty prominent in your finished scones.

Combine remaining sugar with flour, baking powder and salt. Add butter, using a pastry cutter or 2 knives to cut in butter (you may want to use your dingers to be sure butter is evenly mixed into flour). Stir in fruit; then add cream/half-and-half/buttermilk all at once. Use spatula to gently stir dough until it holds together. I chose to add the fruit last because I didn’t want it to break up when I was mixing the dough. I also chose to eliminate the kneading, as the dough was fully incorporated by mixing in the bowl.

Turn onto a lightly floured surface and knead a few times to incorporate dry ingredients. Be gentle so you don’t break up the berries and don’t overwork the dough. Sprinkle dough with flour if it gets sticky.

Press the dough into a circle ¾ inch thick. If any berries peek out, push them into the dough. Cut circle into 6-8 wedges, then transfer wedges to the cookie sheet, leaving ½ inch of space between them.

001 (4)

Bake 15 minutes. Sprinkle with sugar and bake 5-10 minutes more or until the tops are beginning to brown and spring back when you push them (This took another 15-20 minutes in my oven, but keep a careful watch and check every 5 minutes – you do not want dry scones!). (The sprinkling of sugar over the top for the last few minutes of baking creates a simple, sparkly topping.) My scones were done after a total baking time of 25 minutes.

* I used slightly more (maybe 1 Tablespoon) than 2/3 cup to hold the batter together.

Thursday, June 30, 2011

Awesome Jelly

Angelina's Rhubarb Jelly received a Premium ribbon at the LaMoure county 4-H Achievement Days.  Due to flooding in Minot, she won't have the opportunity to show her wares at the ND State Fair (all competition related events have been cancelled).  But this jelly is really tasty and she learned a lot.  This was her third batch of 'preserves' ... we had a little difficulty with Rhubarb Jam and fruit floating at the top, so she tried jelly with much success.

088


Rhubarb Jelly – courtesy of The Rhubarb Compendium

3 1/2 cups Rhubarb juice

1 pkg. Sure Jell powdered pectin

4 cups sugar

Make according to instructions for cooked jelly in Sure Jell instructions.  Process for 10 minutes.  Makes 6 half pints.

Thursday, June 2, 2011

Rhubarb Juice


Rhubarb Juice

8 cups washed and diced rhubarb

8Tbls. sugar

5 cups water

Directions:  Mix all ingredients in a large stock pot.  Cook until soft.  Boil one minute.  Strain the pulp from the juice.  At this point, the juice can be used to make jelly, syrup, or canned for later use.  The red stalked rhubarb will produce a beautiful red juice, but juice made with green stalks will taste the same.  It was also suggested that nutmeg or cinnamon could be added to the juice for a different flavor.

015 (4)

Friday, May 27, 2011

First Fruit of Spring

My mom tells me that at the first sign of the Rhubarb poking out of the ground, my Grandpa Earl would say, "It's time for Rhubarb Pie!"  He's a fan a quite a few different pies, but the first fresh fruit pie of the season is special.  I don't have a pie recipe today, but since Angelina enrolled in Food Preservation for 4-H this year, we tried Rhubarb Sauce.  The first time I ever tried Rhubarb Sauce was at a 4th of July celebration hosted by friends at their farmstead.  The sauce was served over ice cream, creating a perfection of sweet and tangy.  I hope to acquire the recipe used that day, but for now, here is the recipe Angelina and I used to preserve our rhubarb.


Rhubarb Sauce

Ingredients:
1.5 to 2 lbs. rhubarb per quart jar
Sugar

Directions:
Wash the rhubarb stalks and drain. Cut the stalks into 1-inch pieces (we prefer 1/2 inch).  Put rhubarb in a large saucepot.  For each quart rhubarb measured, add 1/2 to 1 cup sugar (we used 1/2 cup to keep the sauce more tart and tangy).  Stir to coat the rhubarb with sugar; let stand 3 to 4 hours in a cool place.  Bring slowly to a boil; boil 30 seconds.  Pack hot rhubarb and syrup into hot jars, leaving 1/2 inch headspace.  Remove air bubbles.  Adjust seals and screw bands.  Process pints and quarts 15 minutes in a boiling water canner.

Remove jars from the canner and let cool at least 24 hours. 

Tuesday, March 8, 2011

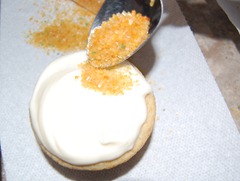
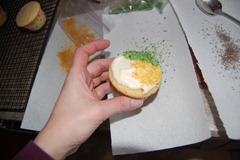
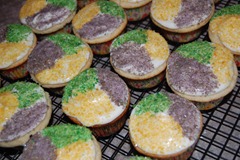
Mardi Gras King Cupcakes


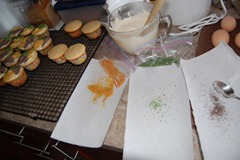
The lemon and nutmeg flavor of these cupcakes reminds me of the King Cake made for last  year’s Mardi Gras.  The cupcakes are quicker and easier for a busy mom, though!

The recipe is at King Arthur Flour…. Mardi Gras King Cupcakes.


037

038

039

040

041

Saturday, January 8, 2011

Amaretto French Toast


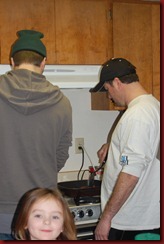
On our recent vacation with my side of the family, each of the ‘sibling’ families took turns in the kitchen.  My brothers Eric and Doug paired up for a couple breakfasts (Doug’s wife wasn’t able to make the trip - something about being 8 mos. along in her third pregnancy and 12 hours away from her doctor in December/January in Montana where snowstorms are frequent – we missed you, Laura!). 

167

My brother Eric in the foreground and Doug in the background.

166


165

Mmmmm … helpers or samplers??

164


Anyway, these two brothers served this AMAZING dish one morning and received rave reviews all around.  Absolutely YUMMY!  Five stars, I’m telling you!!

I made the recipe today just to relish it once more.  I made it with French bread;  my brothers used English Muffin bread.  Both are tasty.

Tip:  If you want more Amaretto flavor, slice the bread thinner.  I grill this on a griddle placed over the burners on my cooktop.  I’ve found that a lower heat works better and prevents burning (if the bread is soaked longer).


Amaretto French Toast

Makes about 6 servings or 18

Ingredients
6 eggs
1 1/2 cup half and half
3 tablespoons sugar
3/4 teaspoon salt
6 tablespoons Amaretto
9 tablespoons butter or margarine
18 slices brioche or egg bread (English Muffin bread and French bread work nicely, too)

Directions
In a shallow dish, whisk together all ingredients. Place bread slices into dish. Let soak for a bit, flip and let other side soak.

Heat a large skillet over medium heat. Add 1 tablespoon of butter. When melted, retrieve slices from egg mixture and add to skillet. Cook 2-3 minutes per side, or until golden brown. Repeat with remaining slices.